

Using The Calendar
Accessing Your Calendar
To open your calendar, click the calendar icon located at the top-right of your screen. Your calendar will slide down over your current view, allowing you to access it without leaving the page you are working on. Clicking the icon again will slide it back up.

Click the calendar icon at the top right of the screen to open the calendar.
Key Interface Elements
Once your calendar is open, you will see three main sections:
- Mini-Calendar: Located in the top-left corner, this provides a quick-view of the month.
- Calendar List: The left panel lists all the calendars you have access to. You can also click “More Calendars” to view others.
- Main Calendar Area: This is the central, standard calendar interface where you will manage your schedule.
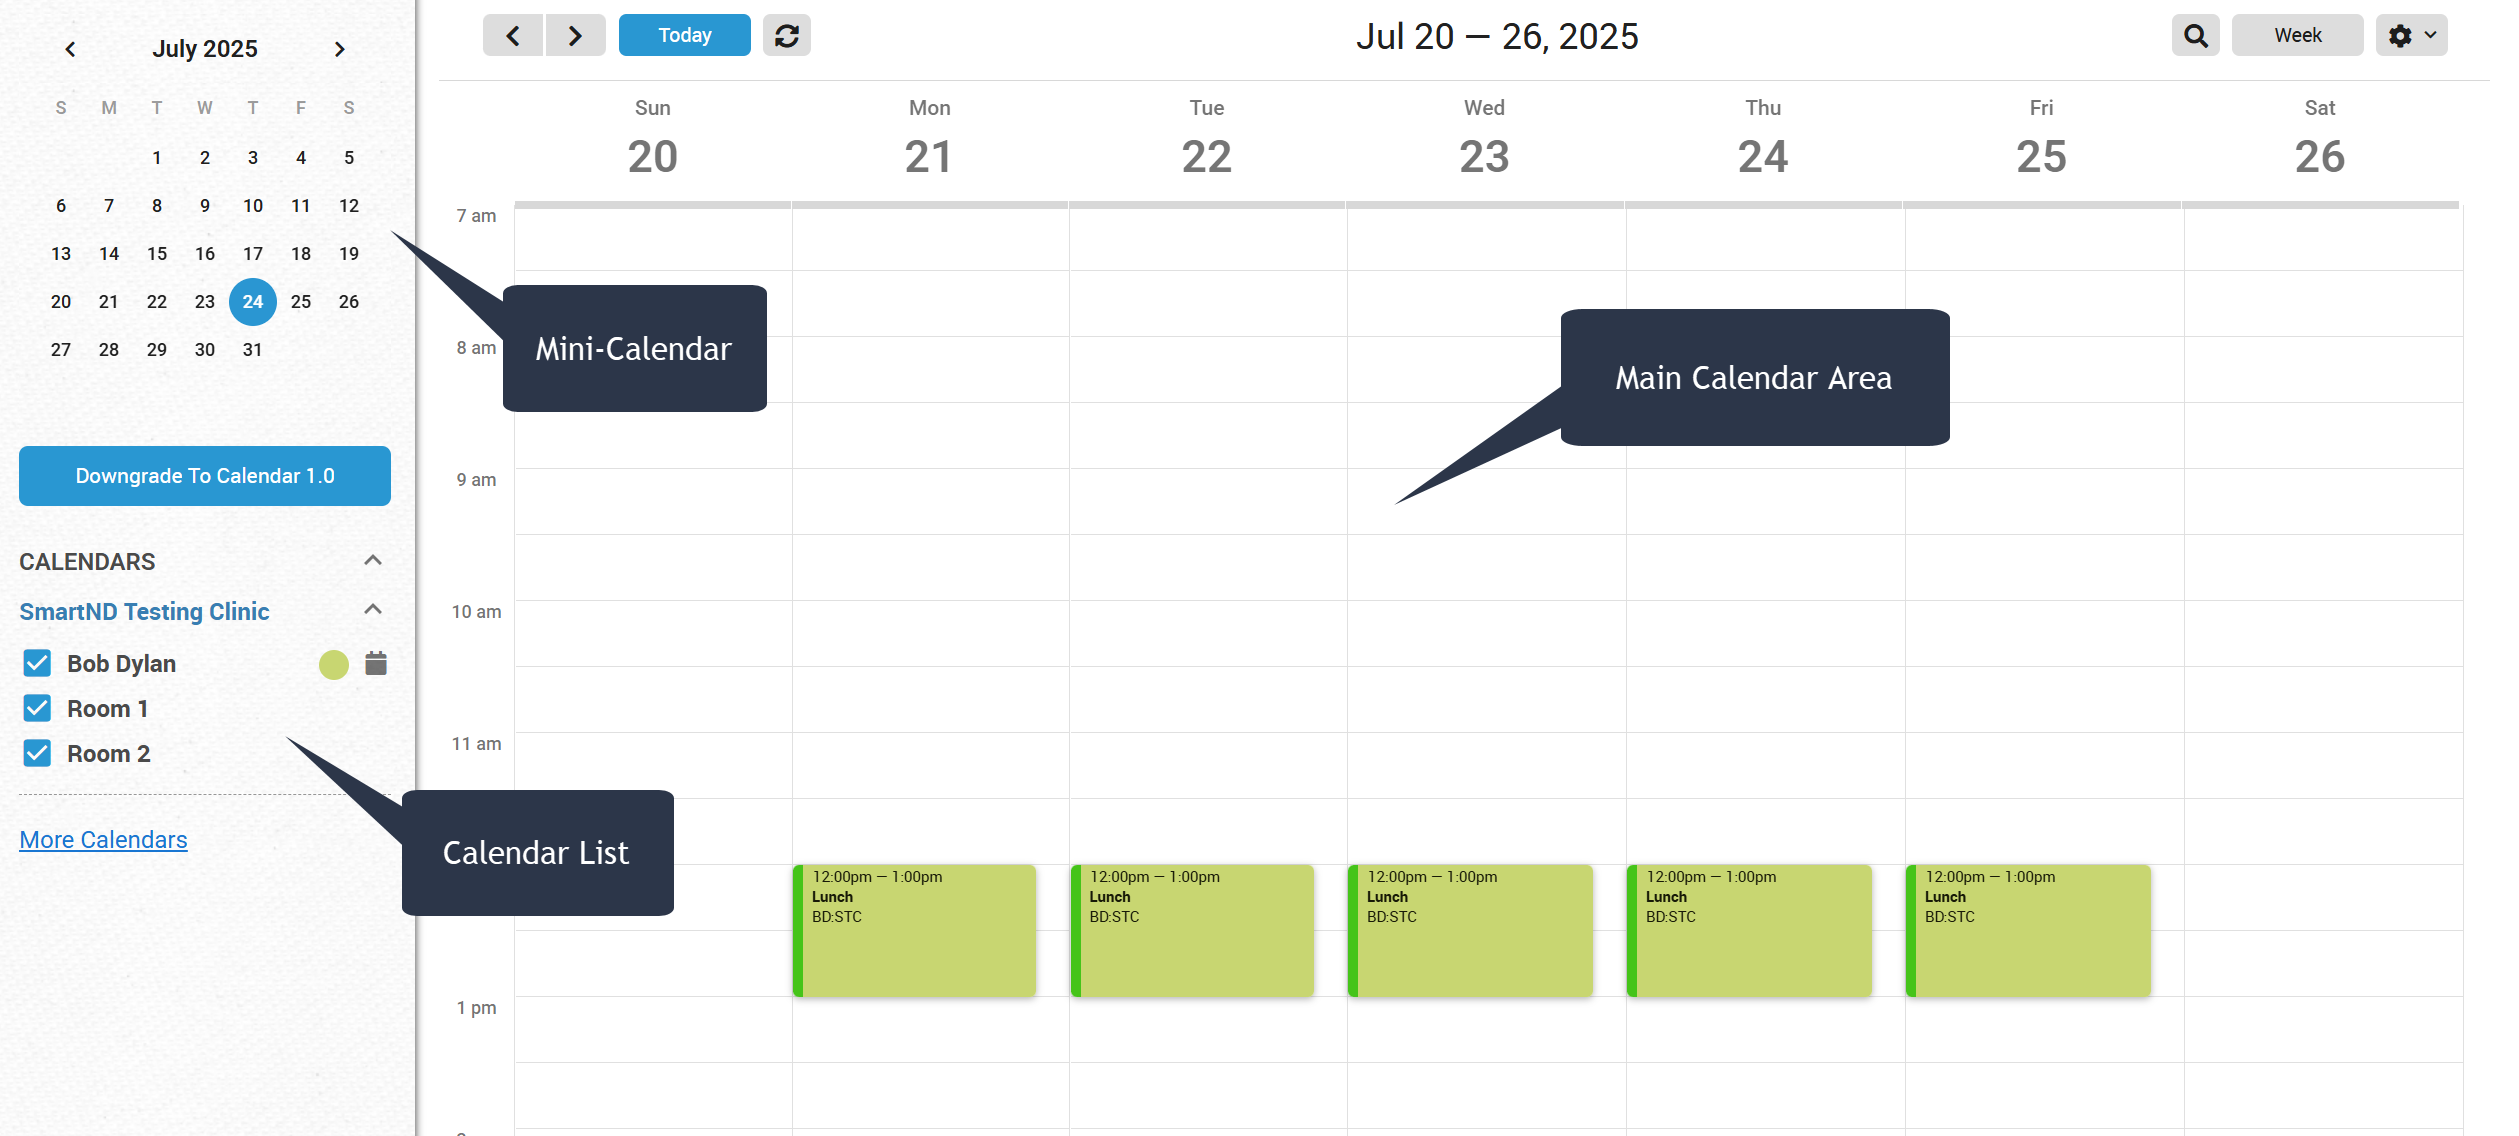
The Calendar Interface
The Calendar Toolbar
A row of buttons runs across the top of the main calendar area. The date you are looking at is shown in the middle of the row.
- Left and right arrows: The two arrow buttons at the far left move the calendar back or forward by one day, one week or one month, depending on the view you are using.
- Today: The blue Today button takes the calendar back to today’s date.
- Refresh: The button with two circling arrows reloads the calendar, so you see any events that other people have just booked or changed.
- Search menu: The magnifying glass button on the right opens a short menu with two choices. Search Calendar opens a page where you can look up past and future events (see Calendar Search). Find Availability lists open appointment times for a practitioner (see Find Availability Tool).
- Views menu: The button beside the magnifying glass shows the name of the current view. Click it to switch between Day, Week, Month and 5 Days.
- Gear icon: The gear icon at the far right opens the Calendar Settings menu, with Event Manager, Calendar Options, Online Booking Options, Online Booking Shortlist and Global Confirmation Message.

The calendar toolbar. The buttons on the left move through the dates, and the buttons on the right open search, the views and the settings.
Core Setup Steps
The most important parts of setting up your calendar involve configuring your Event Types and your Hours of Operation.
1. Creating Event Types
Event Types are the foundational elements of your calendar. They represent the various activities you will be booking, such as client visits, breaks, vacations, or administrative time. You create and manage these in the Event Manager.
2. Setting Hours of Operation
Your Hours of Operation determine when clients can book appointments with you through the online booking system. This allows you to set specific rules and structure your availability for patients.
Once these foundational components are in place, you can proceed to fine-tune each setting. We will cover the individual details of each of these areas in the following guides.
Articles in This Section
- Calendar Overview explains what events are, the calendar views, and how the calendar behaves when you click and drag.
- Booking Events walks through booking a patient appointment or a non-patient event.
- Editing Events covers the event card, status changes, rescheduling and rebooking.
- Deleting & Recovering Events explains the difference between deleting and cancelling, and how to bring back a deleted event.
- Accessing Event Logs shows the history of changes and messages for an event.
- Calendar Alerts explains the patient alerts that appear when you book.
- Calendar Search shows how to find events by patient, practitioner, status or date.
- Creating and Editing Repeating Events covers events that repeat, such as lunch breaks.
- Find Availability Tool lists open appointment times and adds patients to the waitlist.
- Sending a Booking Link From the Calendar lets a patient pick their own time on your booking page.